Article Sections:
Link:
Test Gallery
Discuss:
Discuss this Review
Contents
Introduction
The Caplio R1V was first announced in December 2004, and sports a 4.8x optical zoom and 5 megapixel sensor. Surprisingly, this successor to the 4.0 megapixel R1 was announced just 4 months after the previous model was introduced. Not much seems to have changed, with the exception of the CCD.
With features such as a compact form factor and scene modes, the R1 and R1V appear to be targeted towards the mainstream consumer category – though it does have more “pro” features, which we will discover later. Interestingly, Ricoh cameras come from a history of innovation, with their brand achieving a number of world firsts, including: mass production technologies to camera production in the 1940s, the first digital fax machine and copiers and even the first CD Rewritable drives. As of late, their digital cameras always appear to be setting new boundaries in terms of operating speed, and the R1V continues this trend with a 0.8 second startup time and 0.05 second shutter lag.
Major Features
- 5 megapixel sensor
- 4.8x optical zoom (28 – 135 mm equivalent)
- Ultra fast operating speed
- Compact, lightweight all-metal body
- 1.8 inch LCD monitor
Let’s take a closer look at this camera.
Design top
Build
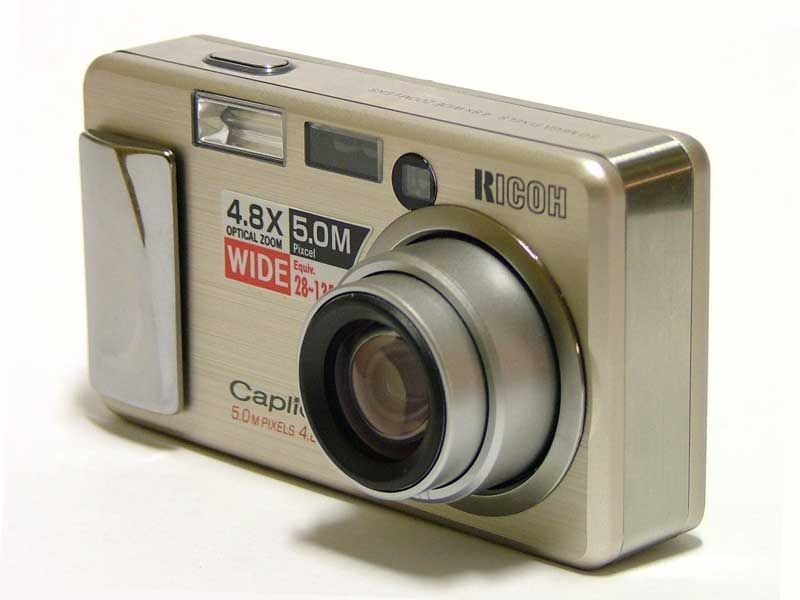
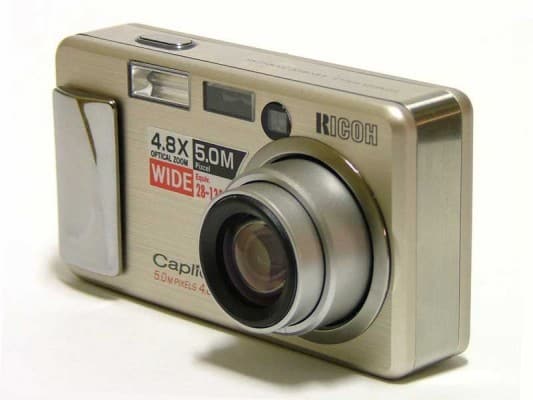
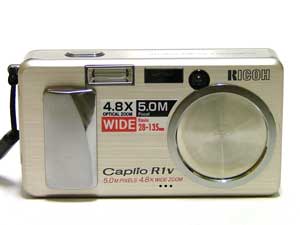
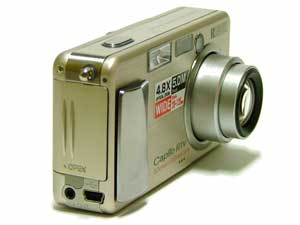
The Ricoh Caplio R1V carries a stylish rectangular shape, with outside surfaces mostly constructed of brushed aluminum. The surfaces are non-marking and come in a choice of silver or black. Stylish simplicity appears to be the name of the game when Ricoh designed this camera – clean empty panels and flat metallic buttons add to the look.
The construction appears to be very solid – no creaks or squeaks, and the battery/memory card opening closes sturdily. A metal tripod mount sits in the centre of the camera bottom. Although it is not aligned with the centre of the lens, it does mean increased stability when mounted on a tripod. Well done Ricoh.
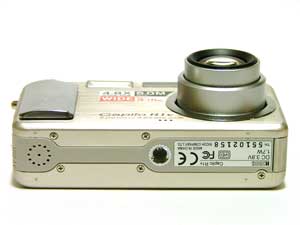
The AV out and USB input ports are not covered, which means that over time, dirt may gather in them. The R1V comes with a thin faux-leather case which does well to protect it from scratches, but probably not much else. When the camera is in the case, the ports are again exposed, again offering no relief from dirt and grime. However, it does mean that you can download photos to your PC with the camera still in the case.
Lens and Imaging
The Caplio R1V is equipped with a 4.6-22.2mm zoom lens, equivalent to 28-135mm for 35mm film cameras. I’m a great fan of wide angle lenses on compact digital cameras, as they make it much easier to take group shots indoors. Plus, it opens up more possibilities of capturing wide landscapes compositions. On the telephoto end, the 135mm is very respectable as well, giving extra reach for nice portraits and more.
I must say that a 4.8x zoom range is quite impressive indeed on a camera this small. The lens zooms smoothly from one end to the other in approximately 1.2 seconds, and allows a fine degree of control. There is also an option to zoom in predefined steps, at 28mm, 35mm, 50mm, 85mm, 135mm respectively. The minimum aperture range on the lens ranges from f/3.3 at the wide end and f/4.8 at the telephoto end. This is average for a compact digital camera.
In terms of sensor, the R1V uses a 1/2.5 inch primary colour CCD with 5.02 million pixels (5.19 million square pixels). It appears that the sensor used on the R1V is somewhere between the 1/2.7 inch one used on the RX and the 1/1.8 inch used on the GX. Note that the GX was a 5.0 megapixel camera as well, so producing this number of pixels out of a sensor of a smaller sensor means that less light will reach each individual pixel. As usual, boosting the signal to get an acceptable image will increase the noise.
Displays
The rear of the camera houses a 1.8 inch translucent amorphous silicon TFT LCD screen with approximately 110,000 pixels. In use, I find that the LCD is a bit grainy and soft, and it is difficult to tell whether the image is really in focus or not. There is no anti-reflective coating on the LCD, so usage in direct sunlight can be a problem. The R1V appears to provide 100% frame coverage.
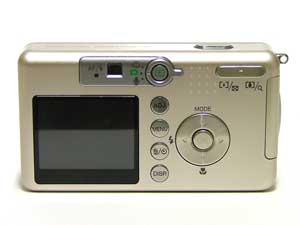
The R1V uses a real-image optical zoom finder, that optically zooms in an out as you press the zoom button. No surprises here – just make sure that you allow for parallax error when using this for composition of nearby subjects.
Usability top
Recording Mode
Ever since getting my hands on digital cameras, I’ve always been disappointed with startup speed of compact cameras. When traveling, opportunities present themselves so frequently that one has to have the camera virtually turned on the whole time – at the expense of keeping your investment protected. The R1V seems to break that mould – in fact, the startup speed is nothing short of breathtaking. When switched on, the lens cover flips open with a sharp thwack and the lens extends itself like a camera on a mission. For the uninitiated, it can be quite startling and the camera is ready to shoot in less than 0.8 seconds.
Shutter lag is similarly nimble. Ricoh claims a world’s fastest 0.05 second shutter response time before focus lock, and 0.003 seconds after pre-focusing. In practice, I have to say that the camera feels like it does respond this quickly. I’m not sure how Ricoh engineers have achieved the former, since pre-focusing itself takes approximately 1/2 of a second to 0.75 of a second before the camera locks focus. Nevertheless, the camera instantly takes a photo with a full press of the shutter button, though a number of the shots did turn out blurry. Perhaps the camera pre-focuses at a set distance with the lens stopped down by default. When performing a full press, the manual warns against camera shake and recommends using a tripod.
Continuous Shooting
A quirk with the R1V is it seems to be reluctant to take consecutive shots if it is not in continuous shooting mode – even if the shutter button is held down. This is accessed via the menus, which is a bit of a hassle, and also means that flash is automatically turned off. In continuous mode though, it rapidly takes 3 shots in succession before it has to write the data to the buffer. The three shots are captured within approximately 1.5 seconds, and the camera takes about 4 seconds to clear the buffer and write the images to the card
Info displays:
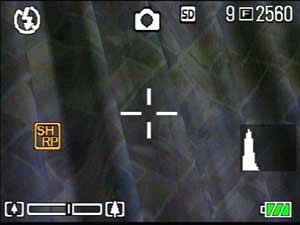
In recording mode, the various settings and indicators are displayed around the screen as icons, including flash mode, macro, image size, battery life, zoom distance and number of shots remaining. Pressing the DISP button reveals a small live histogram view in the bottom right corner. A second press reveals a grid display which is useful for getting horizons straight in the frame. Once more press shows just the image; and a final press turns off the LCD monitor for longer battery life and optical viewfinder-only composition.
Creative Control
Being targeted at a consumer audience, this camera does not have aperture or shutter priority, which is a bit of a pity. I am quite disappointed at this, as it appears that other more advanced settings such as custom white balance, exposure bracketing and manual focus has been included..
To compensate, the R1V is equipped with 6 scene modes – activated by pressing the up botton on the 4 way controller. Portrait mode opens up the aperture to blur the background, while Landscape stops it down for a larger depth of field. Sports mode uses a fast shutter speed to capture action while Nightscape slows it, allowing more ambient light in. Finally, there are two unusual modes – Text which makes text sharper to read, and High Sensitivity, which boosts the brightness of the LCD monitor for easier viewing.
In different lighting situations, the white balance can be manually adjusted to avoid colour casts through white balance modes. The R1V offers Auto, Outdoors, Cloudy, Incandescant, Fluorescent modes as well as a manual mode – a bit of an added bonus. Setting the manual white balance requires navigating to the menu item and pressing the right arrow key, which then takes a measurement off a white/grey surface.
Ricoh offers 3 metering modes for exposure – multi-segment, centre-weighted and spot metering. Multi-segment measures an average of the whole frame, but can be fooled if you have a subject that is set against an overly bright or dim background. The solution is to use the centre-weighted metering or spot metering, which will measure the exposure from a small area in the centre of the frame. Just make sure to use the focus lock and recompose, if the subject is off-centre.
For overly bright or dark scenes, the calculated exposure value can be shifted in 1/3 EV steps between +2.0 / -2.0 EV, using the exposure compensation function. There is also a exposure bracketing function, which takes 3 shots in succession, at 0.5 EV apart. Another bonus is the inclusion of a white balance bracketing function, allows 3 successive shots with a different emphasis on each primary colour.
The Caplio R1V is equipped with a manual focus mode, which allows you to specify which subject in the frame obtains focus. The manual focus implementation requires you to press the OK button, which toggles the zoom lever between operating the focus point and zoom. Pressing the right button magnifies the whole frame by approximately 1.5 times, although I found it difficult to determine focus due to the graininess of the LCD monitor. A approximate distance scale in the bottom left is also shown, although the actual distance isn’t marked.
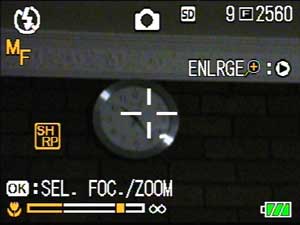
In addition to manual focus, there are two additional modes – snap focus and infinity focus, which disable the autofocus mechanism. The first locks the focus distance to 2.5 meters from the lens for quick shooting and response times. The latter is useful when you know the subject is in the distance – mountains and landscapes for example.
Playback Mode
Playback mode is accessed by pressing the green play button. It takes approximately 1.5 seconds before the first image is displayed. Some useful information is displayed by default, including the resolution, filename, aperture, shutter speed and date. Pressing the DISP button shows a histogram view, a further press clears the screen of information, leaving just the image.
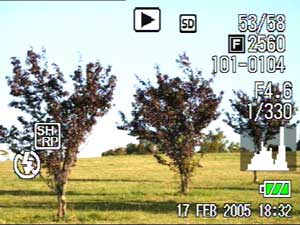
Moving from one image to the next takes approximately one second before the final image is displayed, although an intermediate, lower-quality version is shown almost immediately. Holding down the left or right button brings up a 6 thumbnail view and the cursor quickly scrolls though the displayed thumbnails. Releasing the button then brings up the full view of the image.
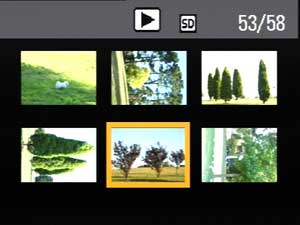
The zoom controller can be used to magnify the image by up to 8x in 12 steps. A zoom map is shown in the bottom left, along with the magnification factor. Zooming right out displays a six image view, allowing easy browsing of the images on camera. In this view, multiple images can be marked for deletion as well using the trash can button.

Ergonomics
The menus on the Caplio R1V have undergone a redesign since the RX/GX models. The menus now have a colourful blue-green feel to them that are text based and easy to read. There is also usually a one line informational text display as well which accompanies the selections, so guesswork is not required.
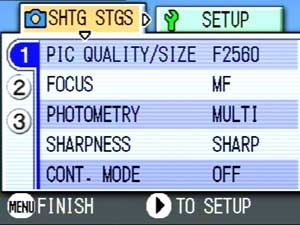
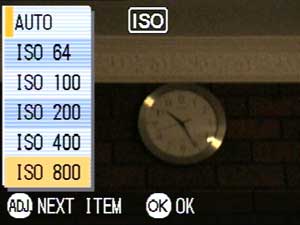
Like its predecessors, the R1V has a handy ADJ button, which cycles through shooting setting easily, instead of having to navigate through menus. The following settings are accessible: Exposure compensation, White balance, ISO Sensitivity, Focus mode, and also an optional 5th slot which can be assigned to other shooting settings. This is a nice implementation, which allows easy access to commonly used functions.
In terms of buttons and control layout, seems to have been designed with streamlined simplicity in mind. The camera is switched on straight into shooting mode by sliding the handgrip at the front of the camera, which also opens the internal lens cover. There is a playback button to the right of the optical viewfinder to activate playback mode, and also a small selector dial around the button which toggles between playback, movie or voice recording mode. Pressing the shutter button at any time (although not in menus for some reason) switches the camera back to shooting mode.
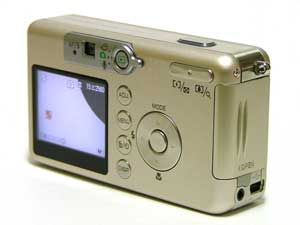
The round, flat metallic buttons have a nice tactile feel when pressed, and are logically laid out. In the hand, the forefinger controls the shutter button, while the thumb has access to the rest of the controls on the back. A comfortable grip is provided by the handgrip on the front of the camera. The only niggling problem I found is that I had to consciously make an effort not to obscure the flash with my middle finger.
I also found the auto-shutoff feature on the camera to be annoying – one has to close and open the off/on switch again before the camera switches on again. Thankfully, the auto-off feature can be disabled.
Portability
The front surface area of Caplio R1V measures 100.2 x 55.0mm and is less than an inch thick at 25.0mm. I find that the camera is just the right size – not too small to be uncomfortable to hold, and not too big to fit in a pocket. Fully loaded, the R1V weighs a touch over 200g.
The R1V accepts either two AA batteries, or the optional rechargeable Li-ion DB-50 battery, rated at 1520 mAh. With the AA Alkalines, expect to get around 200 shots, although I’d recommend using NiMH recharables which should see that figure double or triple. With the DB-50, the R1V is capable of taking between 400 and 500 shots on a single charge, which is quite respectable. Furthermore, there is an option to turn off the LCD screen when shooting, which supposedly increases the battery life tenfold.
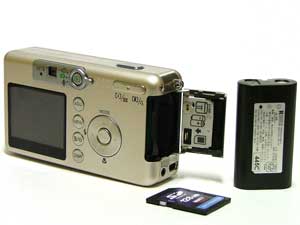
SD cards are quite common these days, offering a good compromise between size and price, and the R1V is capable of using SD cards up to 1G in size. For stills shots, there are two recording modes – normal and fine, and in Fine mode, the images are approximately 1.8 MB in size, which is about average for a 5 megapixel camera. This will give you about 280 photos on a 512 MB card, so plan accordingly if you’re thinking of traveling with this camera. Ricoh also advertise a TIFF image format – though this is only in their black and white TEXT scene mode (for capturing printed material, whiteboards, etc.)
Features top
Macro
The R1V boasts a 1cm macro mode, activated by pressing the down button on the four way controller. I found that the camera focused quite easily on close objects, although attention needs to be to where the focus point is aimed at in the frame. To assist with objects that are off centre, the AF point can be shifted around the frame by pressing the OK button and using the four way controller. In macro mode, the flash is throttled down as well, which is a nice touch.

Flash / Low Light Photography
Wherever possible, I make it a point not to use the onboard flash on cameras as it washes subjects out, but sometimes it cannot be avoided. I found that using the flash with subjects greater than two meters away would leave them underexposed, indicating an underpowered flash unit, while object closer than one metre would be horribly overexposed. It appears that the R1v is very poor at adjusting flash range for subjects – definitely one area that Ricoh will need to work on.

Shooting in low light usually presents a problem to the contrast-detection type autofocus mechanisms, and one would typically see a slowdown in achieving a focus lock. With the R1V, shooting indoors in dim light was a tad bit slower, though not noticeably. This is despite not having an AF assist lamp.
Movie Mode
The R1V is equipped with an AVI (Motion JPEG format compliant) movie mode with sound, although it is only capable of shooting sizes up to 320×240. The movies it produced were fluid and of high quality. In 320 x 240 mode, it uses approximately 25 megs per minute, so with a 512 meg card, you’ll have about 20 minutes worth. When recording movies, the optical is not operational although the R1V allows you zoom in digitally.
Other Features
Some additional features which might come in useful include the interval shooting and the long exposure modes. Interval shooting allows taking full frame photos at pre-set intervals, which can be fun for depicting a cityscape at various times throughout the day. Just make sure that you keep an eye on the camera to make sure no one runs of with it. I’m surprised that Ricoh have included a long exposure mode (which is sort of a quasi-shutter-priority mode), but not aperture priority or even manual exposure modes. This setting allows the user to specify how long the shutter is open for – 1, 2, 4 or 8 seconds – and can be useful for capturing night exposures.
Another unusual addition is the facility to imprint the shooting date onto images – although I am not sure why people would need to do this, as the data is usually embedded in the EXIF information. I suppose in conjunction with the interval timer, it could be useful for laboratory or scientific applications.
Voice recording notes can be taken in playback mode, by switching the playback selector dial to the voice mode. It’s handy for taking notes about your photos on the go, and the notes are saved as WAV files, which can be played back later on your computer.
Finally, the R1V includes the usual 10 second self-timer which allowing photographers to get into photos themselves, and also a 2 second delay. The latter is very useful for long exposure and tripod photography as it allows you to trigger the shutter without the risk of accidentally moving the camera.
Image Quality
In terms of image quality, I found that the biggest flaw with the RX and GX series was the excessive amounts of chromatic aberration or purple fringing in everyday shots. I was pleased to note that this was more controlled on the R1V – although they still appeared in some of the test photos. Lens distortion on the R1V, both at wide and telephoto ends was very minimal as well.

The images produced by the R1V appeared to be sharp, with a reasonable degree of detail. Colours were saturated and pleasing, although the metering did have a tendency to overexpose. More concerning though is the evidence of random noise patterns throughout the empty areas of the frame – even at the default ISO100. I also found some evidence of some sharpening or compression artifacts – making some areas look almost painted or post-processed. While this should not be noticeable in printed images, they could pose a problem if the images are magnified on screen. If overly concerned, the ISO sensitivity can be set to 64, which will reduce noise at the expense of 1/2 a stop of light.


Summary top
Positives
- Great zoom range on a compact camera, nice wide angle
- Advanced features such as bracketing, manual focus modes
- Manual white balance available
- Extremely fast startup and shutter lag
- Histogram in recording and playback modes
- Handy ADJ button with assignable function
- Great battery life, accepts AA and proprietary Li-ion battery
Negatives
- No aperture priority / shutter priority / manual exposure
- A lot of random noise present in images at default ISO100
- Metering has a tendency to overexpose
- Flash range control needs improvement
Recommendation
With the Caplio R1V, Ricoh have produced a consumer camera with some advanced features. While some manufactures prefer to simplify and focus on ease of use, it’s refreshing to see features such as manual focus, ISO 64 to 800, histogram overlay, interval timer and long exposure modes. I would have loved to see aperture priority, shutter priority and manual exposure modes as well, but I guess you can’t have everything.
Design-wise, the wide angle and telephoto range of the zoom lens makes it very versatile and attractive, and the compact, all metal case adds to the durability. The shutter response times and startup speeds nothing short of impressive, ensuring that photographers do less waiting and more shooting. If you’re willing to overlook the image quality issues with noise and over-zealous metering, the Caplio R1V could be the camera for you.
| Design: |           (9.5/10) (9.5/10) |
| Usability: |          (8/10) (8/10) |
| Features: |          (8.5/10) (8.5/10) |
| Image Quality: |         (7/10) (7/10) |
- Don’t forget to check out the Test Gallery.
- Have your say: feel free to leave any feedback or comments.
As I say to all my family, friends and readers – reviews usually comprise of one person’s opinion. Do yourself a favour by visiting your local camera shop and try the camera out for yourself. If possible, bring a memory card with you and take home a few test shots for closer inspection on your own computer. This will give you a better idea whether a camera is suited to your needs.
